Setting up a home studio can be an exciting and rewarding endeavor for musicians, podcasters, voice-over artists, and anyone passionate about audio production. Having a dedicated space where you can unleash your creativity and bring your ideas to life is invaluable. In this article, we will guide you through the process of setting up a home studio, from selecting the right space to acquiring essential equipment and optimizing your setup for optimal results.
Selecting a Suitable Space
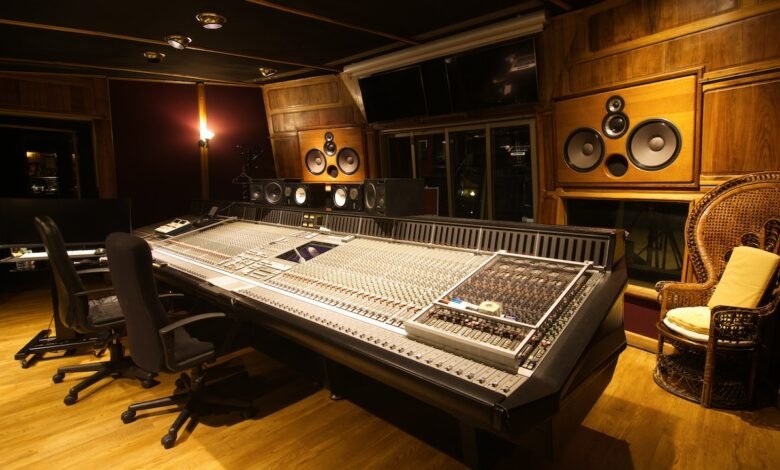
The first step in setting up a home studio is to choose a suitable space. Ideally, you should select a room with good acoustics, as this will greatly impact the quality of your recordings. Look for a space that is free from excessive echoes or reverberations. Additionally, consider the availability of natural light and ventilation, as these factors can contribute to a comfortable and inspiring work environment. It’s also important to isolate the space from external noise sources, such as traffic or loud neighbors, to ensure pristine recordings.
Read More: A Comprehensive Guide to SEO: Boosting Your Website’s Visibility
Essential Equipment for a Home Studio
To create a functional home studio, you’ll need a set of essential equipment. Here are the key components you should consider investing in:
Computer and Digital Audio Workstation (DAW)
A computer is the heart of your home studio setup. It should have sufficient processing power and memory to handle the demands of audio production. Additionally, you’ll need a Digital Audio Workstation (DAW) software, such as Ableton Live, Logic Pro, or Pro Tools, to record, edit, and mix your audio projects.
Audio Interface and Microphone
An audio interface is a crucial piece of equipment that connects your microphones and instruments to your computer. It converts analog signals into digital data that can be processed by your DAW. Pair your audio interface with a high-quality microphone that suits your recording needs, whether it’s a condenser microphone for vocals or a dynamic microphone for instruments.
Studio Monitors or Headphones
Studio monitors, also known as speakers, are designed to provide accurate and transparent sound reproduction. They allow you to hear the nuances and details of your recordings, making them essential for mixing and mastering. If you’re working in a shared living space or need to avoid disturbing others, a pair of high-quality headphones can serve as an alternative.
MIDI Controller and Virtual Instruments
A MIDI controller enables you to control virtual instruments and software synthesizers within your DAW. It provides a tactile interface for playing and recording virtual instruments, making it an invaluable tool for music production. Additionally, invest in high-quality virtual instruments to expand your sonic palette and create professional-sounding tracks.
Cables, Stands, and Accessories
Don’t forget the necessary cables and stands to connect and position your equipment. XLR cables are commonly used for microphones, while instrument cables are suitable for guitars and other instruments. Sturdy microphone stands and adjustable monitor stands are essential for achieving optimal placement. Additionally, consider investing in pop filters, shock mounts, and other accessories to enhance your recordings.


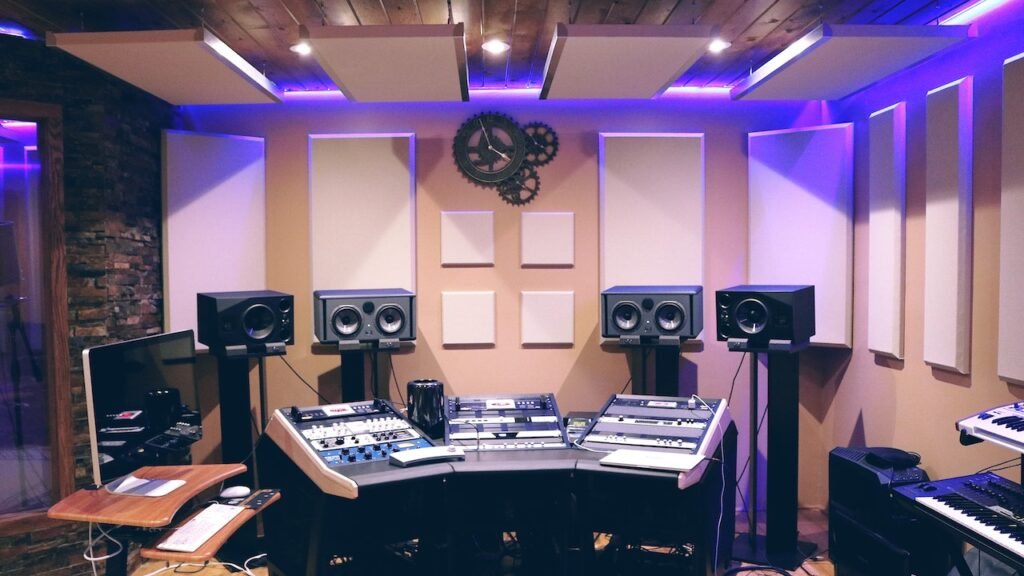
Acoustic Treatment
Achieving a well-balanced and accurate sound in your home studio requires proper acoustic treatment. Acoustic treatment involves controlling the way sound interacts with the room by managing reflections and resonances.
Understanding the Importance of Acoustic Treatment
Acoustic treatment plays a crucial role in creating a controlled listening environment. It helps minimize unwanted reflections, echoes, and standing waves, allowing you to accurately hear the sound being produced.
Using Bass Traps, Diffusers, and Absorbers
Bass traps are acoustic panels designed to absorb low-frequency sound waves and prevent excessive bass buildup. Diffusers scatter sound reflections, creating a more natural and spacious soundstage. Absorbers, on the other hand, absorb mid and high-frequency sound, reducing reverberation and improving clarity.
Placement of Acoustic Panels for Optimal Results
To optimize the effectiveness of your acoustic treatment, strategic placement of panels is essential. Identify primary reflection points on the walls and ceiling, and position absorption panels or diffusers accordingly. Bass traps should be placed in corners where bass buildup tends to occur. Experiment with different placements and configurations to achieve the best possible sound in your room.
Setting Up the Recording Area
The recording area within your home studio requires careful consideration to ensure optimal sound capture. Follow these steps to set up your recording area effectively:
Positioning the Microphone and Stand
When recording vocals or instruments, proper microphone placement is crucial. Experiment with different positions to find the sweet spot that captures the desired sound. Use a sturdy microphone stand to secure the microphone and reduce handling noise.
Creating a Comfortable and Ergonomic Work Environment
Your home studio should be a comfortable and inspiring space where you can focus on your creative process. Invest in a suitable chair and desk that promote good posture and provide ample space for your equipment. Consider adding mood lighting or decorations that enhance the ambiance and reflect your personal style.
Optimizing the Space for Recording Different Instruments
If you plan to record multiple instruments in your home studio, it’s essential to optimize the space accordingly. Set up dedicated areas or zones for different instruments, ensuring they are acoustically treated to minimize sound bleed. Consider using movable baffles or room dividers to create separation between instruments and achieve cleaner recordings.
Mixing and Mastering
Mixing and mastering are crucial stages in the production process that transform individual tracks into cohesive and polished final products.
Explaining the Process of Mixing and Mastering
Mixing involves balancing the levels, panning, and EQing individual tracks, as well as adding effects and spatial enhancements. Mastering is the final stage where the mixed tracks are refined, optimized for different playback systems, and prepared for distribution.
Utilizing Plugins and Effects
Plugins and effects are invaluable tools for shaping the sound of your recordings. Use EQ plugins to fine-tune the frequency balance, compression plugins to control dynamics, and reverb plugins to add space and depth. Experiment with different plugins and effects to find the ones that complement your musical style.
Balancing the Levels and Creating a Cohesive Sound
Achieving a balanced mix requires careful attention to the levels of each track. Make sure no instrument or element dominates the mix excessively. Use automation to add movement and dynamics to your mix. Pay attention to the overall tonal balance and aim for a cohesive sound that translates well on different playback systems.
Creating a Productive Workflow
A productive workflow is essential to maximize your efficiency and creativity in the home studio. Consider the following tips to streamline your recording and editing process:
Organizing Files and Projects
Establish a clear file management system for your projects. Create folders for each project, and organize your audio files, project files, and reference materials accordingly. Consistent file naming conventions will help you locate files quickly and avoid confusion.
Utilizing Project Templates
Create project templates in your DAW that include commonly used tracks, effects, and settings. Templates allow you to start new projects quickly, saving time and ensuring consistency across your work. Customize templates based on the types of projects you frequently work on, such as music production, podcasting, or voice-over work.
Streamlining the Recording and Editing Process
Take advantage of features in your DAW that can speed up your recording and editing workflow. Learn keyboard shortcuts to perform common functions quickly. Utilize features like comping to easily select the best parts of multiple takes. Take breaks regularly to maintain focus and avoid fatigue during long recording or editing sessions.
Collaboration and Remote Recording
In today’s interconnected world, collaborating with other artists and musicians remotely has become increasingly common. Here’s how you can set up your home studio for collaboration:
Using Online Collaboration Tools
Numerous online collaboration tools and platforms allow you to work with musicians and artists from different locations. Use cloud storage platforms like Dropbox or Google Drive to share project files, stems, and reference materials. Virtual communication tools like Zoom or Skype can facilitate real-time discussions and feedback sessions.
Setting Up Remote Recording Sessions
When collaborating remotely, it’s important to ensure that both parties have a reliable internet connection and suitable audio interfaces. Use low-latency audio streaming platforms like Source-Connect or SessionLinkPRO to record and monitor audio in real-time. Communicate and plan with collaborators in advance to ensure a smooth and productive recording session.
Overcoming Challenges in Remote Collaborations
Remote collaborations may present challenges, such as differences in time zones, varying recording setups, or technical issues. Establish clear communication channels and discuss expectations and deadlines with your collaborators. Be prepared to troubleshoot technical problems and offer support to ensure a successful collaboration.
Troubleshooting and Maintenance
As with any technology-based setup, issues and maintenance requirements may arise in your home studio. Here are some common troubleshooting and maintenance tips:
Dealing with Technical Issues
Technical issues can range from software crashes to hardware malfunctions. Stay updated with the latest software and firmware updates for your equipment. Troubleshoot common problems by checking cables, drivers, and system configurations. Reach out to online communities, forums, or technical support if you encounter persistent issues.
Regular Equipment Maintenance
To ensure the longevity of your equipment and maintain optimal performance, regular maintenance is crucial. Clean your microphones, audio interfaces, and studio monitors regularly to remove dust and debris. Protect your equipment from excessive heat or humidity. Follow manufacturer guidelines for maintenance and consult professionals if necessary.
Troubleshooting Common Recording Problems
When recording, you may encounter issues such as unwanted noise, clipping, or improper gain staging. Educate yourself on techniques to eliminate or mitigate these problems. Experiment with microphone placement, adjust gain levels, and use noise reduction tools to improve the quality of your recordings.
Conclusion
Setting up a home studio is an exciting journey that allows you to unleash your creativity and pursue your passion for audio production. By selecting a suitable space, investing in essential equipment, optimizing your acoustics, and streamlining your workflow, you can create a professional and inspiring environment for your artistic endeavors. Embrace the possibilities of collaboration and overcome challenges with remote recording. Remember to troubleshoot technical issues and maintain your equipment regularly to ensure long-term success in your home studio.
Read More: 5 Ways to Detect Hidden Cameras Using Smartphone (2023)
FAQs
What is the minimum budget required for setting up a home studio?
The budget for setting up a home studio can vary depending on your specific needs and goals. It is possible to start with a modest budget by prioritizing essential equipment and gradually expanding your setup. However, for a more comprehensive and professional-grade setup, a budget of a few thousand dollars may be necessary.
Can I use a laptop instead of a computer for my home studio?
Yes, a laptop can serve as the central hub for your home studio setup. Ensure that the laptop meets the minimum system requirements for your chosen DAW and has sufficient processing power and memory to handle your audio projects. Connect external peripherals such as audio interfaces and monitors for enhanced functionality.
How important is it to invest in high-quality studio monitors?
High-quality studio monitors are essential for accurate sound reproduction in your home studio. They provide a transparent and unbiased representation of your audio, allowing you to make informed mixing decisions. Investing in monitors with a flat frequency response and detailed imaging can greatly enhance the quality of your mixes.
What is the role of an audio interface in a home studio setup?
An audio interface acts as the bridge between your analog audio sources, such as microphones or instruments, and your computer. It converts analog signals into digital data that can be processed by your DAW. Additionally, audio interfaces provide essential features like preamps, phantom power, and connectivity options for monitoring and recording audio.
Can I use virtual instruments instead of physical ones?
Absolutely! Virtual instruments offer a wide range of sounds and instruments that can rival their physical counterparts. They are often more cost-effective and provide the flexibility to experiment with different sounds and styles. Many professional musicians and producers rely heavily on virtual instruments in their home studios.


![How to Update Play Store App on Android [2023]](https://www.techknowmad.com/wp-content/uploads/2023/03/How-to-Update-Play-Store-App-on-Android-2023-390x220.png)


