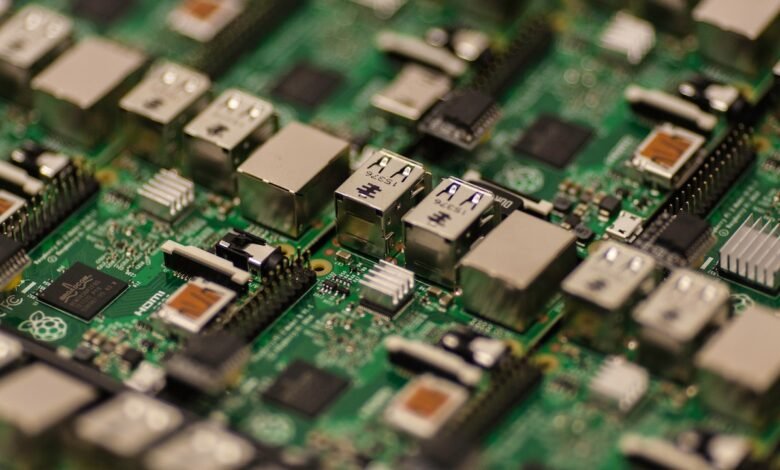
Raspberry Pi is a credit card-sized computer that has gained immense popularity among technology enthusiasts and hobbyists. It offers a cost-effective and versatile platform for learning, experimenting, and creating various projects. This article will guide you through the process of setting up a Raspberry Pi, from installation to exploring exciting projects.
Pi is a small yet powerful single-board computer developed by the Raspberry Pi Foundation. It is designed to promote computer science education and inspire creative projects. The Raspberry Pi provides a compact platform with various connectivity options and GPIO (General-Purpose Input/Output) pins, making it ideal for both beginners and advanced users.
Read More: How to Build an E-commerce Website: Platforms and Essential Features
Choosing the Right Raspberry Pi Model
When setting up a Raspberry Pi, it’s essential to choose the right model based on your requirements. The Raspberry Pi lineup includes different models, each with its unique features and capabilities. Consider factors such as processing power, RAM, connectivity options, and intended use to select the most suitable Raspberry Pi model.
Gathering the Required Hardware
Before diving into the Raspberry Pi setup, gather the necessary hardware components. You will need:
- Raspberry Pi board (selected model)
- MicroSD card (16GB or higher)
- Power supply (compatible with the Raspberry Pi model)
- HDMI cable (for video output)
- USB keyboard and mouse
- Monitor or TV
- Ethernet cable or Wi-Fi adapter (for network connectivity)Downloading the Operating System
To run your Raspberry Pi, you need an operating system (OS). The Raspberry Pi Foundation provides an official OS called Raspberry Pi OS (formerly Raspbian). Visit the official website and download the latest version of Raspberry Pi OS.
Writing the Operating System Image to an SD Card
Once you have downloaded the Raspberry Pi OS image, you need to write it to the microSD card. To do this, you can use a tool like Etcher (available for Windows, macOS, and Linux). Insert the microSD card into your computer, open Etcher, select the OS image and the target SD card, and click “Flash” to write the image.
Initial Setup and Configuration
Insert the microSD card into the Raspberry Pi, connect the HDMI cable, USB keyboard, mouse, and power supply. The Raspberry Pi will boot up, and you’ll be prompted to perform the initial setup. Follow the on-screen instructions to set your preferences, such as language, time zone, and password.
Connecting Peripherals
To enhance the functionality of your Raspberry Pi, you can connect various peripherals. These include USB storage devices, cameras, sensors, and displays. Take advantage of the GPIO pins to interface with external components and expand the capabilities of your projects.


Accessing the Raspberry Pi
There are multiple ways to access your Raspberry remotely. One common method is using Secure Shell (SSH) to establish a command-line connection from another computer. Alternatively, you can set up a graphical remote desktop environment using tools like VNC (Virtual Network Computing).
Exploring the Desktop Environment
Raspberry OS provides a user-friendly desktop environment based on the popular Linux distribution, Debian. Spend some time familiarizing yourself with the desktop interface, exploring the pre-installed applications, and customizing the settings according to your preferences.
Updating the System
Regularly updating your Raspberry system is crucial to ensure optimal performance and security. Use the package manager or command-line tools like apt to update the operating system, firmware, and installed software packages.
Installing Software and Packages
The Raspberry supports a wide range of software and packages. Whether you’re interested in coding, multimedia, IoT, or gaming, you can find suitable applications and libraries. Use the package manager or explore online resources to discover and install software that aligns with your project goals.
Exploring Raspberry Pi Projects
One of the most exciting aspects of owning a Raspberry Pi is the ability to undertake various projects. Here are a few project ideas to get you started:
Building a Home Media Center
Transform your Raspberry into a media center by installing Kodi or other media player software. Connect it to your TV and enjoy streaming movies, TV shows, music, and more.
Creating a Retro Gaming Console
Relive the nostalgia of classic games by turning your Raspberry into a retro gaming console. Install RetroPie or Lakka, connect USB controllers, and play your favorite games from the past.
Developing Internet of Things (IoT) Applications
Combine the power of Raspberry with IoT technologies to create innovative applications. Build a smart home system, monitor environmental conditions, or automate everyday tasks.
Setting Up a Web Server
Use your Raspberry as a web server to host websites or run web-based applications. Install Apache, NGINX, or other web server software and start serving content to the world.
Conclusion
Setting up a Raspberry Pi opens up a world of possibilities for learning and creating. From the initial installation to exploring exciting projects, this article has provided a comprehensive guide to help you get started. Embrace the versatility of the Raspberry Pi and let your imagination soar as you embark on your own technological adventures.
Read More: A Comprehensive Guide to UX Design: Creating User-Friendly Interfaces
Frequently Asked Questions (FAQs)
Q1: Can I use any microSD card for my Raspberry?
Yes, as long as it meets the minimum requirements. It is recommended to use Class 10 or higher microSD cards for optimal performance.
Q2: Do I need programming knowledge to use a Raspberry?
No, you can start using a Raspberry even without prior programming knowledge. However, learning programming languages like Python opens up more possibilities.
Q3: Can I connect a touchscreen display to my Raspberry?
Yes, Raspberry supports various touchscreen displays. Make sure to check compatibility and follow the manufacturer’s instructions for installation.
Q4: Is it possible to run multiple operating systems on a Raspberry?
Yes, you can set up multiple operating systems using a technique called “dual boot” or by using virtualization tools like QEMU.
Q5: Can I power my Raspberry using a power bank?
Yes, you can power your Raspberry using a power bank as long as it provides sufficient voltage and current for your model.


![How to Update Play Store App on Android [2023]](https://www.techknowmad.com/wp-content/uploads/2023/03/How-to-Update-Play-Store-App-on-Android-2023-390x220.png)